How to Replace an Electrical Outlet (Phoenix Homeowner Guide)
Step-by-step guide to replacing a wall outlet safely in a Phoenix home, with the NEC 2023 code section behind every step: breaker off, verify dead, GFCI, AFCI, tamper-resistant, grounding and torque.
By Gabriel · Licensed Phoenix, Arizona General Contractor ROC 367058 (R-62) · 2026-10-29
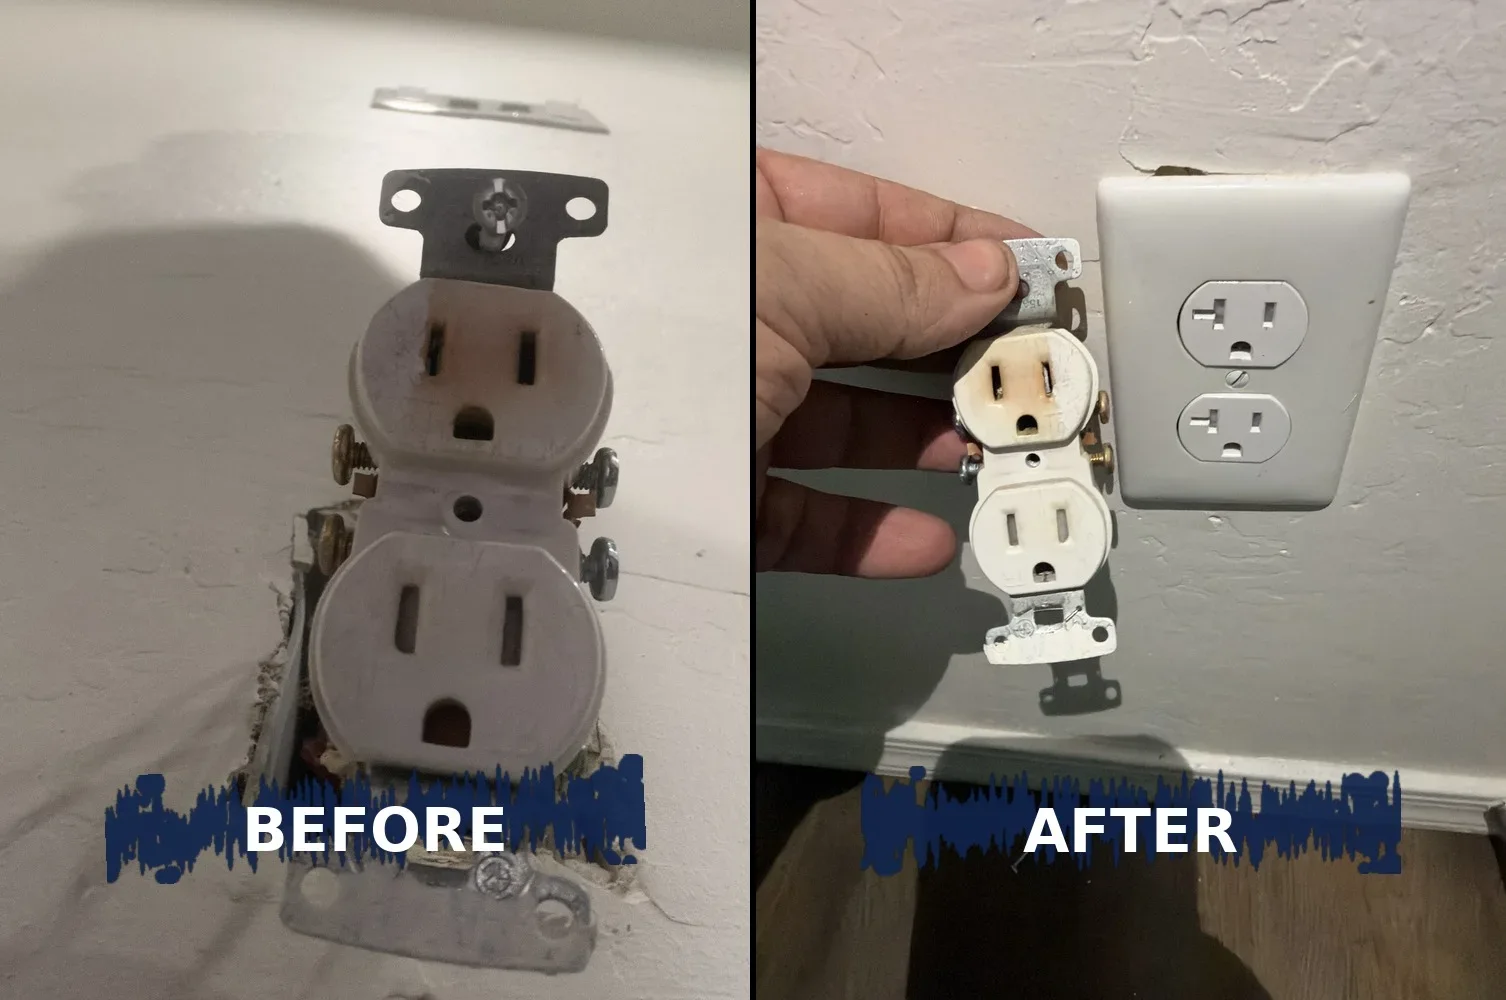
A loose, cracked, discolored or dead outlet is one of the most common calls I get in Phoenix. Replacing one is a small job, but it is still live electrical work, and the replacement has to meet today's code rules, not the rules from when the house was built.
Below is the exact order I follow. Every step says why it matters and which National Electrical Code (NEC 2023, NFPA 70) section it comes from, so you understand the reason and not just the motion.
Tools and parts
- Non-contact voltage tester
- Multimeter (or two-lead voltage tester)
- Plug-in receptacle tester (GFCI test button type)
- Insulated screwdrivers and a torque screwdriver
- Wire stripper / cutter
- New listed receptacle: tamper-resistant, and GFCI, AFCI or weather-resistant where required
- Wire nuts and a short green or bare copper pigtail if needed
- New cover plate
Step-by-step
Find the right breaker, turn it off, and label it
Plug a lamp or radio into the outlet, then switch breakers off until it goes dead. Leave that breaker off and put tape over it so nobody turns it back on while you work. Fix the label on the panel door if it was wrong.
Why: Panel labels in older Phoenix homes are often wrong or blank, and a mislabeled circuit is how people get shocked. The code requires every circuit to be legibly identified by its specific purpose, so correcting the label helps the next person too.
Code: NEC 408.4(A) (circuit directory / identification)
Verify the outlet is dead with two testers
Check the non-contact tester on a known live outlet, then hold it at both slots and at each wire once the cover is off. Then confirm with a meter: measure hot-to-neutral, hot-to-ground and neutral-to-ground. Re-check the meter on a known live outlet afterwards.
Why: Non-contact testers can miss voltage (weak battery, shielded cable, a second circuit in the same box). A meter test at the point of work, with the meter proven on a known source before and after, is the professional standard for confirming a safe, de-energized condition.
Code: NFPA 70E-2024 120.6(7) (test for absence of voltage at the point of work, verify the tester before and after)
Remove the old outlet and inspect the box and wires
Remove the cover plate and the two mounting screws, then pull the outlet out gently. Take a photo of how it is wired. Look for: an equipment grounding conductor (bare or green wire, or a metal box with metal conduit or cable armor), wires pushed into back-stab holes, nicked or brittle insulation, scorch marks, and dull silver aluminum wire.
Why: What you find decides which replacement is legal. If a grounding means exists in the box, the new outlet must be a grounding-type (3-prong) receptacle connected to it. If there is no ground, only specific options are allowed (see step 4). Aluminum branch-circuit wire needs devices identified for it, so stop and call a pro if you see it.
Code: NEC 406.4(D)(1) (grounding-type replacement where a grounding means exists) · NEC 406.4(D)(2) (options where no equipment ground exists) · NEC 110.14 (conductor terminations, dissimilar metals such as aluminum)
Choose the correct replacement receptacle
Match the amp rating to the circuit (on a circuit with more than one outlet, a 15 A circuit gets a 15 A receptacle and a 20 A circuit may use 15 A or 20 A; a single receptacle alone on a circuit must be rated at least as high as the breaker). In a home, use a tamper-resistant (TR) receptacle. Kitchens, bathrooms, garages, laundry areas, outdoors and spots near sinks need GFCI protection. Bedrooms, living areas, kitchens, hallways, closets and laundry areas need AFCI protection when you replace a receptacle there. Outdoor and other damp or wet spots need a weather-resistant (WR) receptacle and the proper cover.
Why: A replacement outlet must bring that location up to today's protection rules. TR shutters keep kids from pushing objects into the slots, GFCI protects people from shock near water, AFCI reduces fire risk from arcing wires, and WR devices survive heat, dust and monsoon moisture. With no ground wire, a GFCI receptacle marked “No Equipment Ground” is one of the allowed choices, and that label must be applied.
Code: NEC 210.21(B)(1) and 210.21(B)(3) (receptacle rating vs. circuit rating) · NEC 406.12 and 406.4(D)(5) (tamper-resistant) · NEC 210.8(A) and 406.4(D)(3) (GFCI in dwelling locations) · NEC 210.12 and 406.4(D)(4) (AFCI for replacements) · NEC 406.9 and 406.4(D)(6) (weather-resistant, wet/damp locations) · NEC 406.4(D)(2)(b),(c) (“No Equipment Ground” / “GFCI Protected” marking)
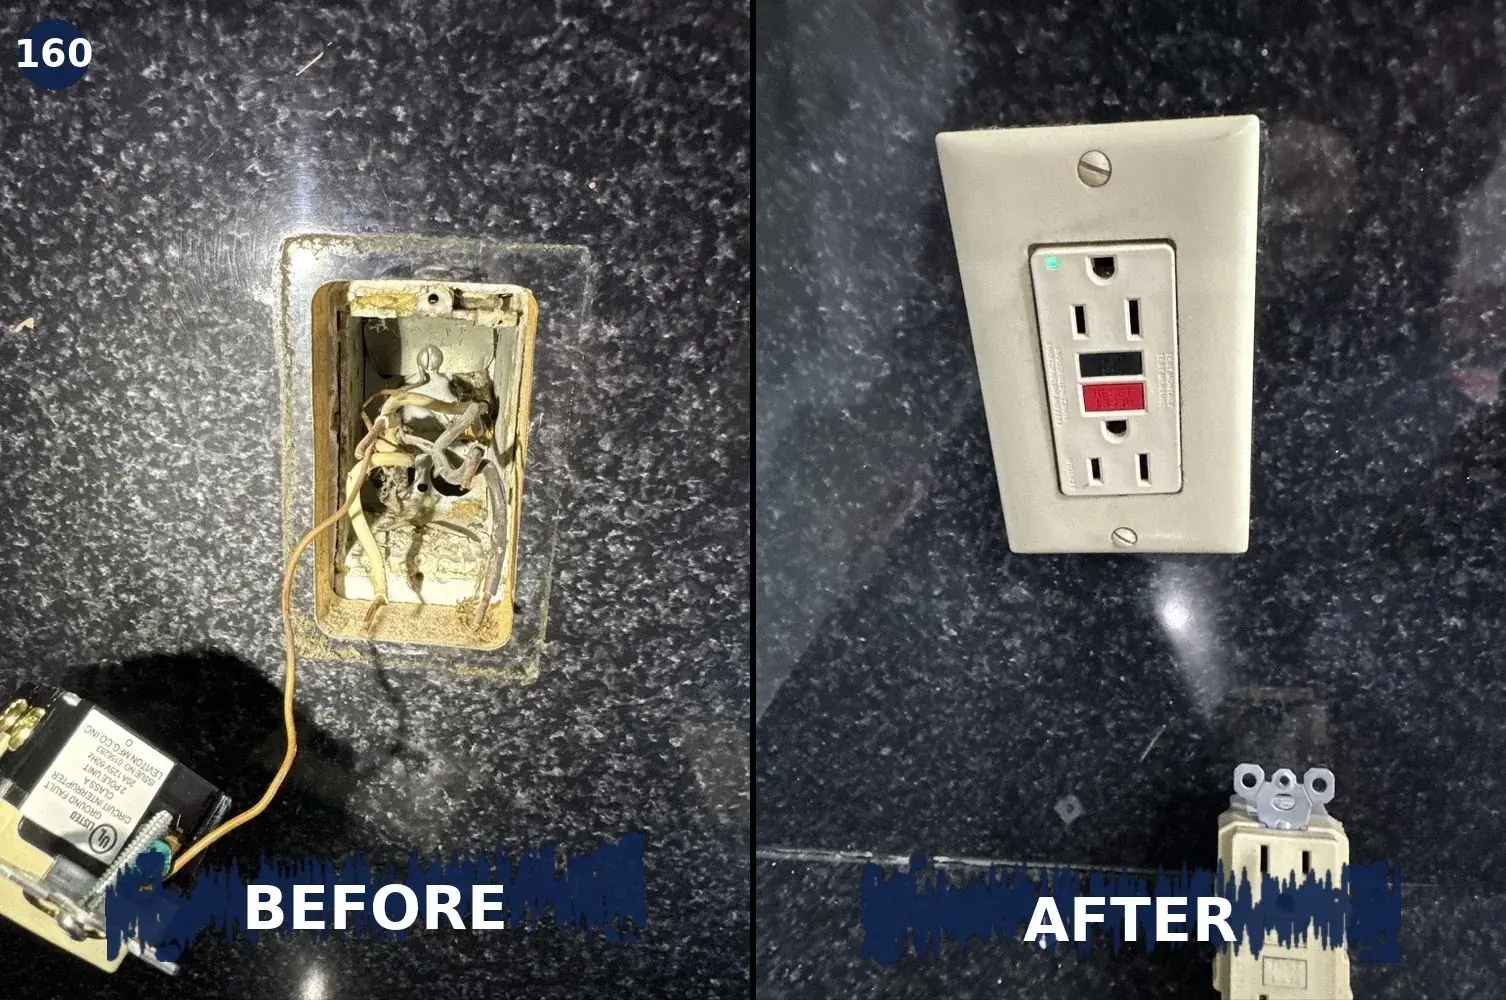
Kitchen countertop outlets need GFCI protection. Here an old backsplash outlet was replaced with a GFCI receptacle. Make sure everything fits in the box
Count the wires in the box. A GFCI or AFCI receptacle is much deeper than a standard one. If the box is already crowded or the wires are very short, you may need a deeper box, a box extension, or a GFCI at the first outlet of the circuit or at the breaker instead.
Why: Each box has a maximum number of conductors based on its volume, and the device itself counts as two conductors. Overstuffed boxes trap heat and damage insulation. You also need enough free wire length to make a good connection without stretching it.
Code: NEC 314.16 and 314.16(B)(4) (box fill, device counts as two conductors) · NEC 300.14 (at least 6 in. of free conductor at each box)
Prepare the wire ends
Cut off any damaged or burned ends back to clean copper. Strip to the length shown on the receptacle's strip gauge. Bend a hook and wrap it clockwise around the screw, or use the receptacle's back-wire clamp. Avoid the push-in (back-stab) holes.
Why: Most heat-damaged outlets I replace failed at a loose or back-stabbed connection. Screw terminals and clamp-type back-wire terminals hold the wire much tighter. The receptacle's listing and instructions say which wire sizes and connection methods it accepts, and those instructions are part of the code.
Code: NEC 110.14(A) (terminals, wire-binding screws for 10 AWG and smaller) · NEC 110.3(B) (install per listing and instructions)
Connect hot and neutral to the correct terminals
Black (hot) goes to the brass screw. White (neutral) goes to the silver screw. On a GFCI, the wires coming from the panel go to the LINE terminals; only use LOAD if you mean to protect outlets downstream.
Why: Reversed polarity puts voltage on the wrong parts of lamps and appliances. GFCIs wired backwards may not protect anyone, which is why many will not reset until LINE and LOAD are correct.
Code: NEC 200.11 (polarity of connections) · NEC 200.10(B) (identified neutral terminal) · NEC 110.3(B) (GFCI LINE/LOAD per instructions)
Connect the ground so it never depends on the outlet
Join all the grounding wires in the box with a short pigtail to the green screw on the receptacle. In a metal box, also bond the box with a green grounding screw or listed clip.
Why: If grounds are only connected through the outlet, removing that outlet breaks the ground path for everything downstream. The ground path is what trips the breaker fast during a fault.
Code: NEC 250.148 and 250.148(B) (grounding continuity in boxes) · NEC 250.146 and 406.11 (bonding the receptacle grounding terminal)
Tighten every terminal to the specified torque
Use a torque screwdriver set to the value printed on the receptacle or its instructions, often listed in pound-inches. Give each wire a light tug test afterwards.
Why: Under-tightened screws loosen with heat cycles and arc, which is what burns outlets. Over-tightened screws can cut the wire. The code requires a calibrated torque tool where the manufacturer gives a torque value.
Code: NEC 110.14(D) (terminal connection torque)
Fold the wires in, mount the outlet, and install the cover
Fold the wires back neatly, secure the receptacle so it is straight and held firmly, and install a cover plate that sits flat and covers the opening. If there are gaps of more than 1/8 in. around the box in drywall or plaster, patch them.
Why: A loose outlet moves every time you plug something in, which works the connections loose. The faceplate keeps fingers away from live parts, and patching gaps keeps the box enclosure intact.
Code: NEC 406.5 (receptacle mounting) · NEC 406.6 (receptacle faceplates) · NEC 314.21 (repairing gaps around boxes)
Restore power and test
Turn the breaker back on. Use a plug-in tester to confirm correct wiring. Press TEST on a GFCI (power should cut off) and RESET. Test AFCI devices with their test button as instructed. If anything reads wrong, turn the breaker off and recheck.
Why: Testing proves the work, not just the wiring diagram. GFCI and AFCI makers require a test after installation, and that instruction is part of the device listing.
Code: NEC 110.3(B) (follow listing and test instructions)
When to stop and call a licensed pro
- You see dull silver aluminum branch wiring (common in some 1960s-70s homes).
- There is no ground and you want three-prong outlets or surge protection that really works.
- The box or wires are scorched, melted or brittle, or the outlet felt warm before it failed.
- The breaker trips again, or more than one outlet stopped working at the same time.
- Anything inside the electrical panel, a new circuit, or a new outlet location (these usually need a permit; check with your city).
- The box is too small for a GFCI/AFCI device, or the house has two-wire knob-and-tube or cloth wiring.
Common questions
Do I need a GFCI outlet when I replace an outlet?
If the outlet is in a location that requires GFCI protection today (kitchen countertops, bathrooms, garages, outdoors, laundry areas, near sinks and other spots listed in NEC 210.8(A)), the replacement must be GFCI protected per NEC 406.4(D)(3). That can be a GFCI receptacle, an upstream GFCI, or a GFCI breaker.
Can I put a three-prong outlet on a two-wire circuit?
Only with GFCI protection and the required “No Equipment Ground” / “GFCI Protected” labels (NEC 406.4(D)(2)), or after a grounding conductor is properly added (NEC 250.130(C)). A three-prong outlet with nothing connected to the ground screw is not allowed.
Why do outlets in Phoenix burn or melt?
In my experience it is usually a loose or back-stabbed connection that heats up under heavy loads like space heaters, window units or air fryers. That is why steps 6 and 9 (good terminations and correct torque) matter so much.
Want it done right the first time?
I handle outlet, switch, GFCI and fixture work across Phoenix. See my Electrician service in Phoenix, or call or text 859-878-0554 and text me a photo for a fast estimate.
Licensed Phoenix, Arizona General Contractor ROC 367058 (R-62)